Yashica-C TLR Review
I’d been given a Yashica-C TLR 20+ years ago. The shutter was bit off when I got it, so it didn’t get used for much; just a roll or two to show it worked, but it didn’t meet my needs then. Fast forward, the imitation leather had cracked off and the shutter was a little more off. But I’m rediscovering film these day. (With primary interest in LF B&W) I like the square format of 6×6 and the relative portability of MF.
Sent it off to http://www.deansphotographica.com/ for a CLA and new pleather. Came back looking nice and with a smooth and accurate shutter. And the work was done on schedule for a reasonable price.
Got some Fomapan 100 film, which I’ve never used before for this testing. Had a roll of 400 which I’d run through a Rolleiflex a month or so ago but found 400 too grainy.
With the Yashica, I guessed the outdoor exposure. Shot the obligatory brick wall, then a scene with a lot of dynamic range. Then I brought it inside, hooked up a white lightning monolight with umbrella to my Minolta flashmeterV to get a reading. Then I hooked up the Yashica and used up the rest of the film.
I processed it in Xtol 1:2 for 8.5 minutes and the next day scanned the negatives on my V700 at 3200 dpi.
The film is good; quite good for the price; very forgiving of exposure. Good range. Perhaps not as crisp as tmax 100, but that’s not what it is. It’s a decent film for outdoor and portraits. I would probably want to use a meter for outdoor photography with tmax.
This yashica-C does not have the desirable version of the lens found on the 124/124g. I really can find no fault with this “lesser” lens as it was used by me (mid range aperature choices). Wide open, I don’t expect perfection and it might be nice for portraits; haven’t done any wide open tests yet.
Challenging Outdoor light; sunny day, white building, shadows, dark rust colored Indiana sculpture. “Sunny 8” exposure; Maine is rarely bright enough for sunny16, so it’s sunny11 with an extra stop to expose for the shadows particular to this scene.
| Click this bar to view the full image. |

100% crop
| Click this bar to view the full image. |

Indoor skintones
| Click this bar to view the full image. |

Cropped and downsized about 33%
| Click this bar to view the full image. |

prefocused the camera, wound it, cocked it, set the finder to sport mode and handed it to my 4yo. Told her to get a picture of me.
| Click this bar to view the full image. |

Inevitably, she asked to see the picture afterwards, without looking to see that it didn’t have an LCD screen. I’ll give her a couple more years to figure out rule-of-thirds.via First roll through the Yashica-C.
Yashica Mat 124G Review – One of the most popular TLR

I have this TLR for over a year by now. It has been a pleasant experience with this classic camera and it is time for a report to share what I get fascinated with this TLR and perhaps note down some difference in experience that I have with the Rolleiflex Automat MX-EVS.

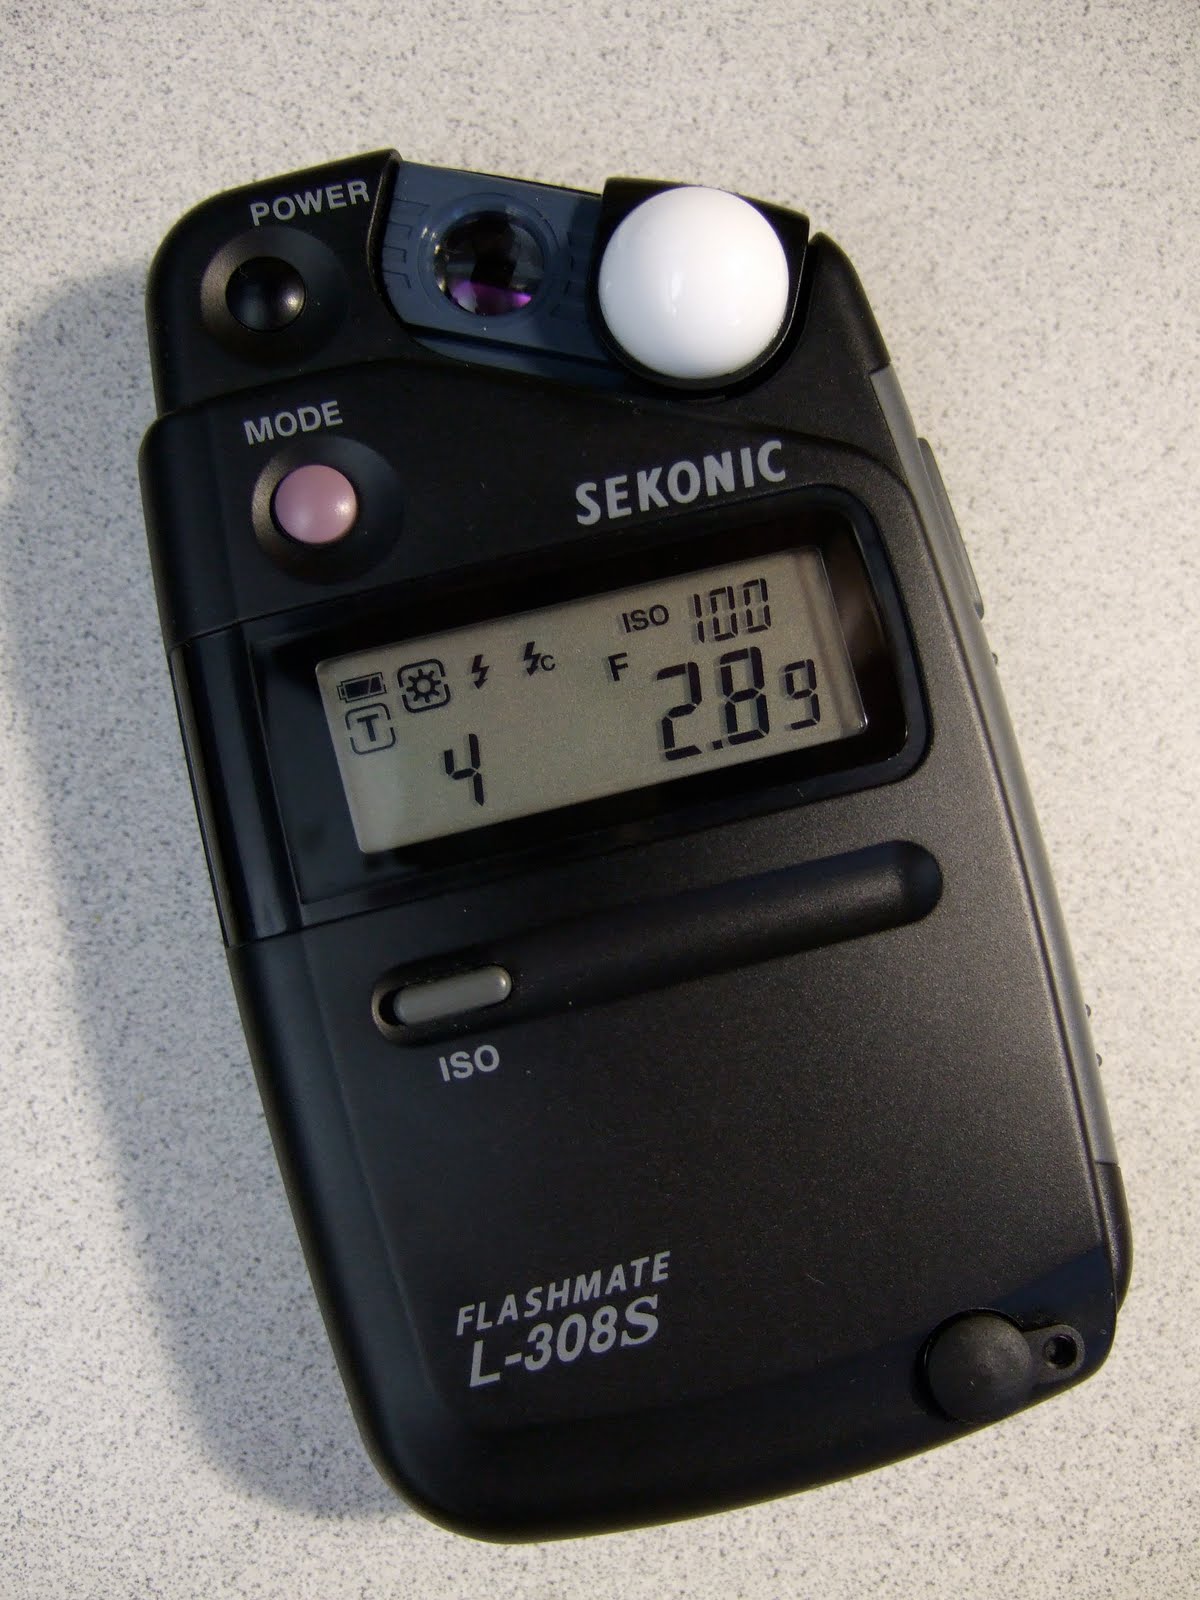 First of all, it has a built-in meter and it is a convenient feature to have. My Yashica works surprisingly well with the built-in meter when I first got it. After halve year of storage, I forget to unload its battery and I got its metering all ruined due to corrosion of battery. I opened up the top waist level finder and it seems like a do-able job to re-wire the metering but so far I have not attempted to fix the broken meter. Instead, I added a Sekonic flashmate L-308S to help with the metering.
The Sekonic light meter works quite well with my Yashica. I tried both b&w and color films on my Yashica Mat 124G and both come out nicely. The Yashinon 80mm f/3.5 is reasonably sharp and has good contrast in the color photos. The next thing that I need to try is to use it more on various films and research if I can use a flash on the Yashica.
 Shot with Fuji Acros 100, Sekonic L-308S
The Tech Museum of San Jose
 Shot with Fuji Acros 100
metered with original meter
 Shot with Fuji Acros 100
metered with Sekonic L-308S
 Shot with Fuji Acros 100
metered with Sekonic L-308S
 Shot with Kodak Ektar 100
metered with Sekonic L-308S
 Shot with Kodak Ektar 100
metered with Sekonic L-308S
Impressions & Notes
- The Yashinon 80mm f/3.5 is reasonably sharp and I am well pleased with the results.
- The built-in meter is a nice feature to have but mine is unfortunately broken. It is important to remember my lesson to remove the battery when not in operation.
- Unlike the Rolleiflex Automat MX-EVS that I had, its focusing screen is easier for me to focus. The ground glass with circular rings along with the magnifier provide me enough detail in good lighting to focus at ease. It takes some practice and it is more difficult for indoor type of lighting. Overall, I think I find focusing easier on the Yashica than my Rolleiflex.
- The film rewind is not as refined and controlled as the solid rewind lever in the Rolleiflex. The rewind lever in Yashica does not give you the confidence for long lasting lever. The build quality in Yashica can’t match the solid build quality in the Rolleiflex. The build in Yashica is good but not outstanding like the Rolleiflex.
- I managed to open up the top portion of its waist level finder and I managed to clean up the internal mirror housing and it can be done with caution. Re-assembly can be tricky and I will try to update this post with links to instructions for cleaning the internal mirror.
- It is lightweight and that is the best part about this TLR. With a good neck strap, this TLR is very portable for hours of shooting. You will end your film roll wanting more to continue the shooting. It is very pleasant to carry around for a longer period of shooting time as in a half day of shooting.
- I recently use the Yashica with a lightweight tripod and I can frame with more confidence for critical angle and position.
- It takes sometime to get used to the reverse orientation in framing but by the time I get to my 3rd roll, I no longer have that awkward feeling in unfamiliar framing withTLR
- The Yashica opens up my desire for more square photos in 6×6. It is very addictive in the process.
- Scanning at home with a limited flatbed is MUCH easier with 120 films when compared to 135 films
- It is unfortunate to note that many Yashica Mat 124G are over-priced in the used market. It used to be in the $100’s and now a good copy is frequently bid up to over $200. And it is always a risk on the unknown conditions subject to the mercy and honesty of the seller in the listing. My copy is likely not the norm in the eBay as it is just really in Excellent condition and I was one of those who bid Yashica over $200. Shame on Hin! In my opinion it should be much less as in $150 or so.
The Copal MXV Shutter in a Yashica D TLR Camera – Ratfactor
The Copal MXV Shutter in a Yashica D TLR Camera – Ratfactor.
This is really a fantastic step-by-step instruction by Dav Gauer…
If you have problem with your Yashica D, maybe can have a try!
The Copal MXV Shutter in a Yashica D TLR Camera
A Step-by-Step Guide by Dave Gauer
My tale begins with an eBay auction. Some strange fascination with TLR (Twin Lens Reflex) cameras has brought me here. $32 later (plus shipping) and I’ve got my very own Yashica TLR. I discern that it is the D model from the manual shutter cocking, right-side focus and film advance, and other visual cues.
When I started to play with the critter, I realized that the shutter was not opening. Well, the eBay seller had made no promises to the contrary. It was time to crack the camera open. Join me as we enter a world of gears and springs where life is cheap and parts are small.
Putting the camera back together is pretty much just the reverse of the above. Here is a handy checklist to make sure you don’t miss anything:
- Put the flash sync spring back on the screw/post and replace the flash sync (if you took it off)
- Put the shim(s) or washer(s) in place where the speed regulator goes
- Put the speed regulator in and screw it down
- Put the self timer back in and secure it with the snap ring. My self timer was damaged, as I have mentioned. The shutter works fine without it, but at least the frame of the self timer is needed so that the speed cam detent spring can be placed on it.
- Put the shutter speed cam back on the shutter mechanism. Be sure that all of the pins (shown in the picture) clear the various holes and slots provided.
- Put the shutter speed cover on the cam so that the holes line up with various pins (on mine, the printed “B” aperture setting lined up with the post protruding out of the top of the speed cam.)
- Carefully screw down the cover ring. Be sure it is threading properly before applying any force.
- Turn the set screw to secure the cover ring
- Work the shutter to make sure all of the controls work properly
- Align the shutter release lever so that it fits into the slot in the mounting plate
- Underneath the shutter, arrange the stack of rings so that they align. On mine, I needed the ring containing the manual shutter reset lever to be in the right position and all of the rings needed to have a slot lined up with a hole in the mounting plate so that a post from the shutter went through them all and secured them
- Screw the lens barrel onto the back of the mounting plate, breath a sigh of relief
- If detached, re-connect the small spring that resets the shutter reset lever
- Line up the aperture and shutter speed levers with the controls inside the shutter cover and put the shutter cover back on. Make sure that rotating the aperture and speed wheels on the cover operate the shutter controls. Secure the cover with the five screws
- Screw the shutter lever knob back on counter-clockwise
- Re-attach the lens assembly to the body of the camera with four screws
- Put the top cover back on the lens assembly with four screws
- If desired, re-glue the leatherette. You’ll probably want to play with the camera for a while to make sure it works before you do this. I’ve still got my leatherette off and am debating whether or not to glue the old one back on. Update: I still haven’t. I think it looks fine without.
Good luck, and I hope the Copal Shutter in your Yashica camera is now fully functional!
